

Back
How to use the Call List
Table of contents
Once you've got a target live and inviting patients to book, the associated Call list will start filling up and it's time to try and book them in over the phone!
This guide outlines how to use the tool:
- Click on 'Call List' on the left hand side menu
- Look for the dropdown 'Select a target', and choose the target that you want to work on at this moment
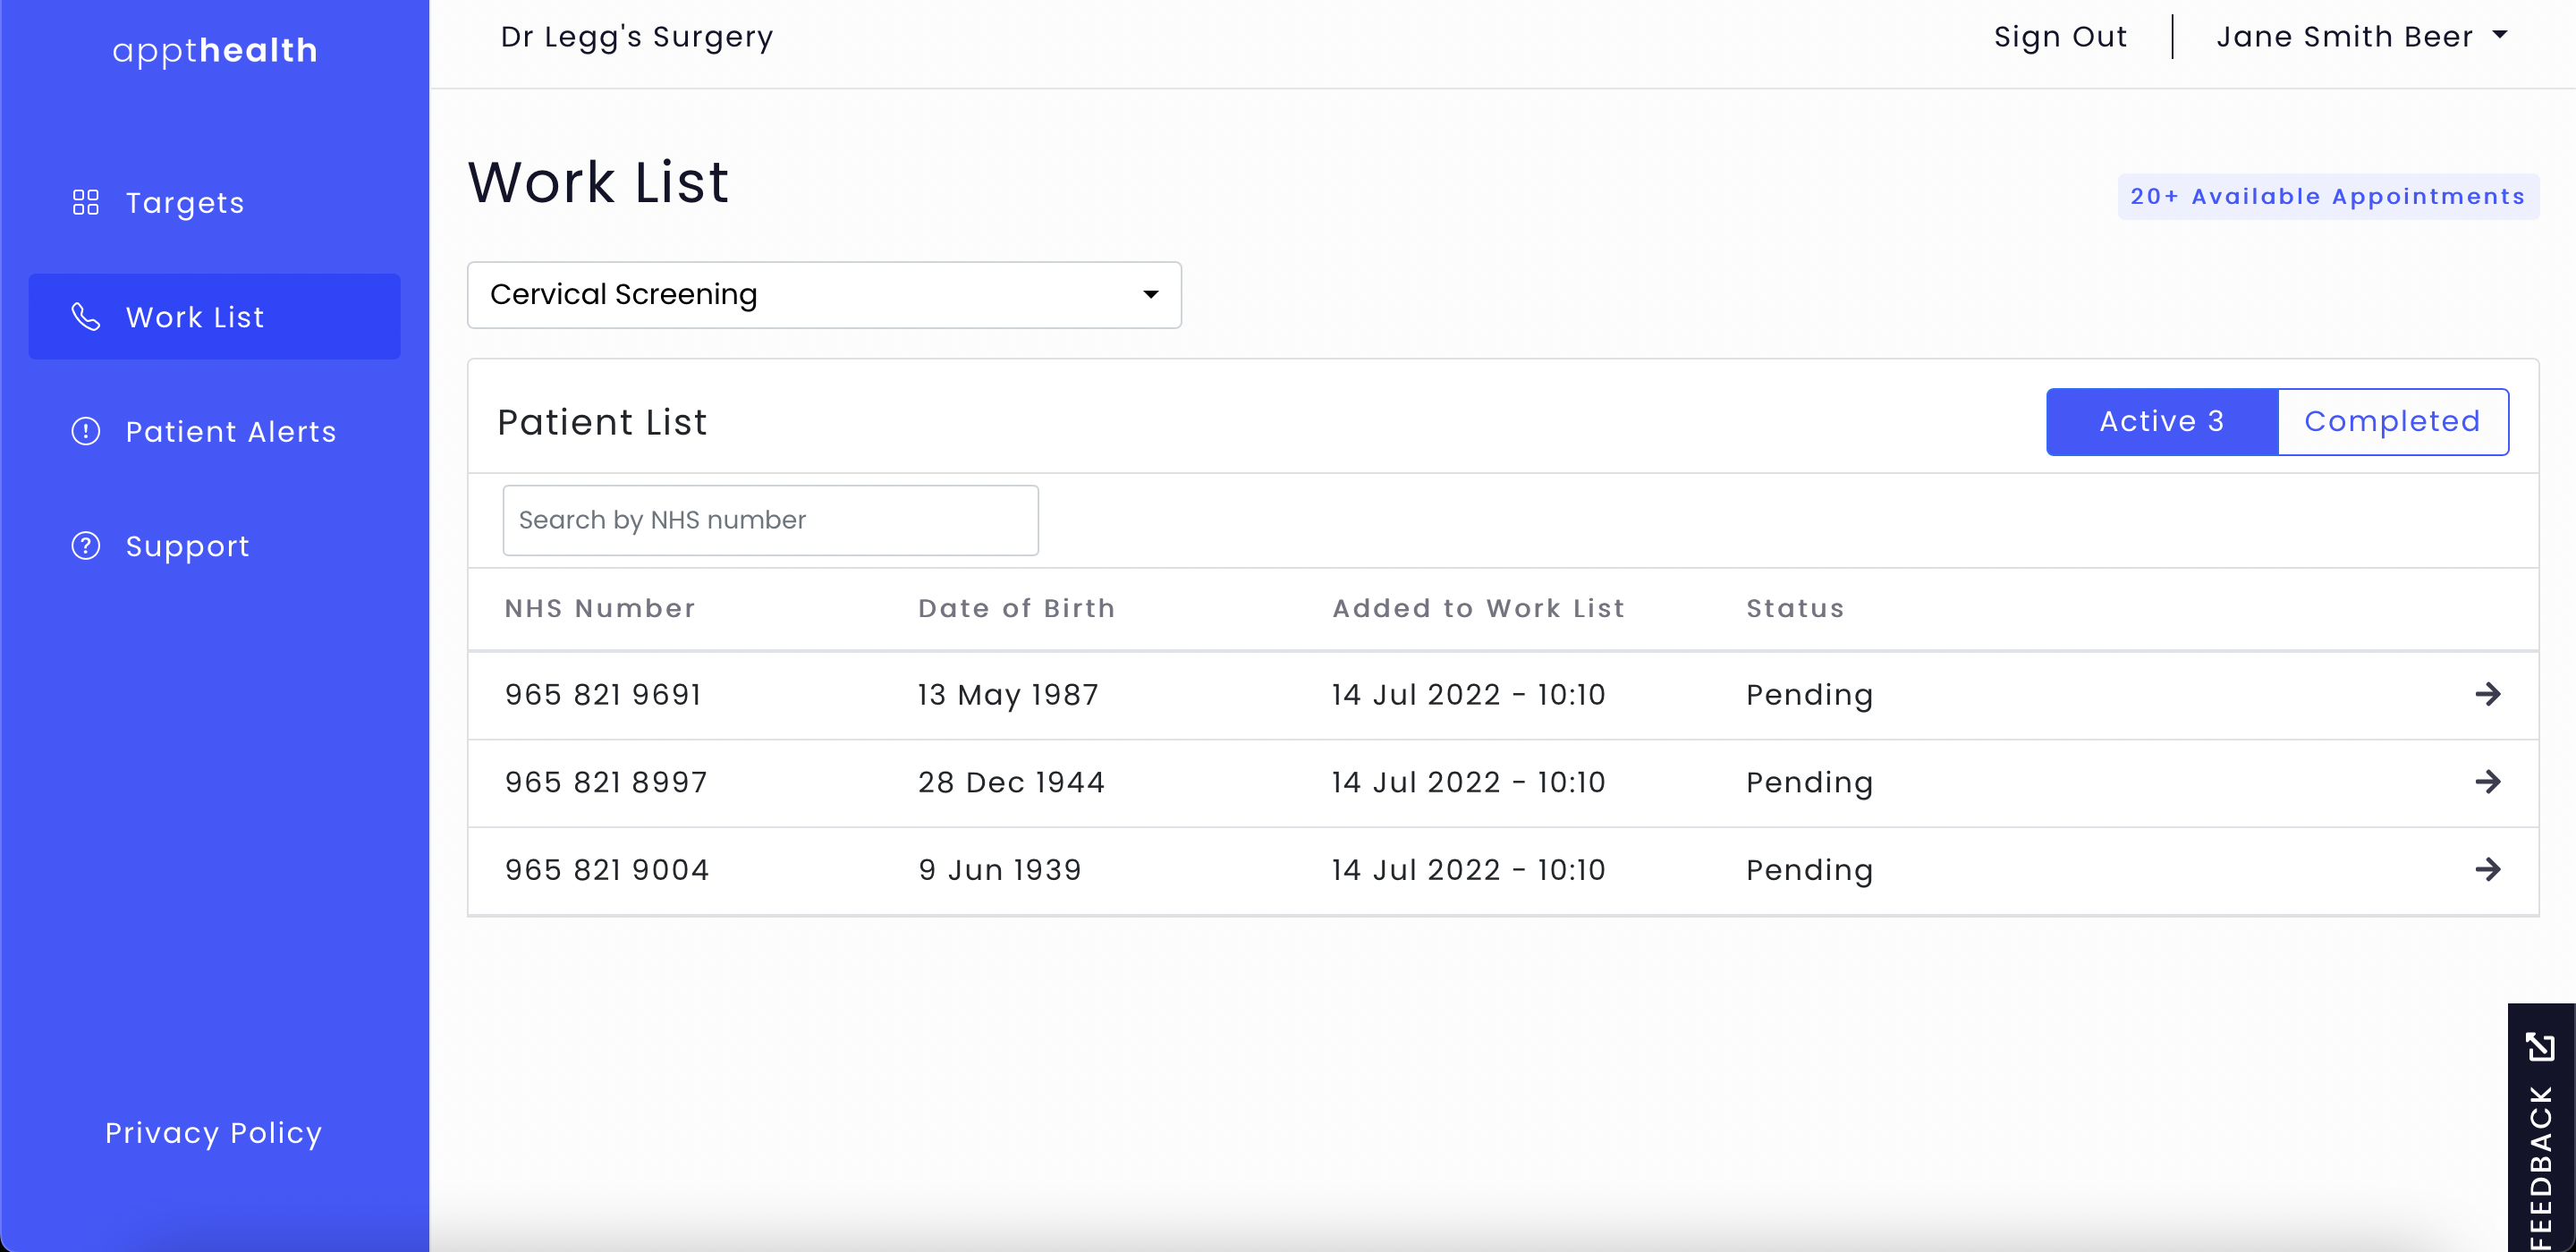
- You should now see a list of patients that need manual calling in order to book them in.
- Click on the patient at the top of the list to get started (this make take a few seconds as the patient record will be verified with GPConnect records, indicated by a spinning wheel)
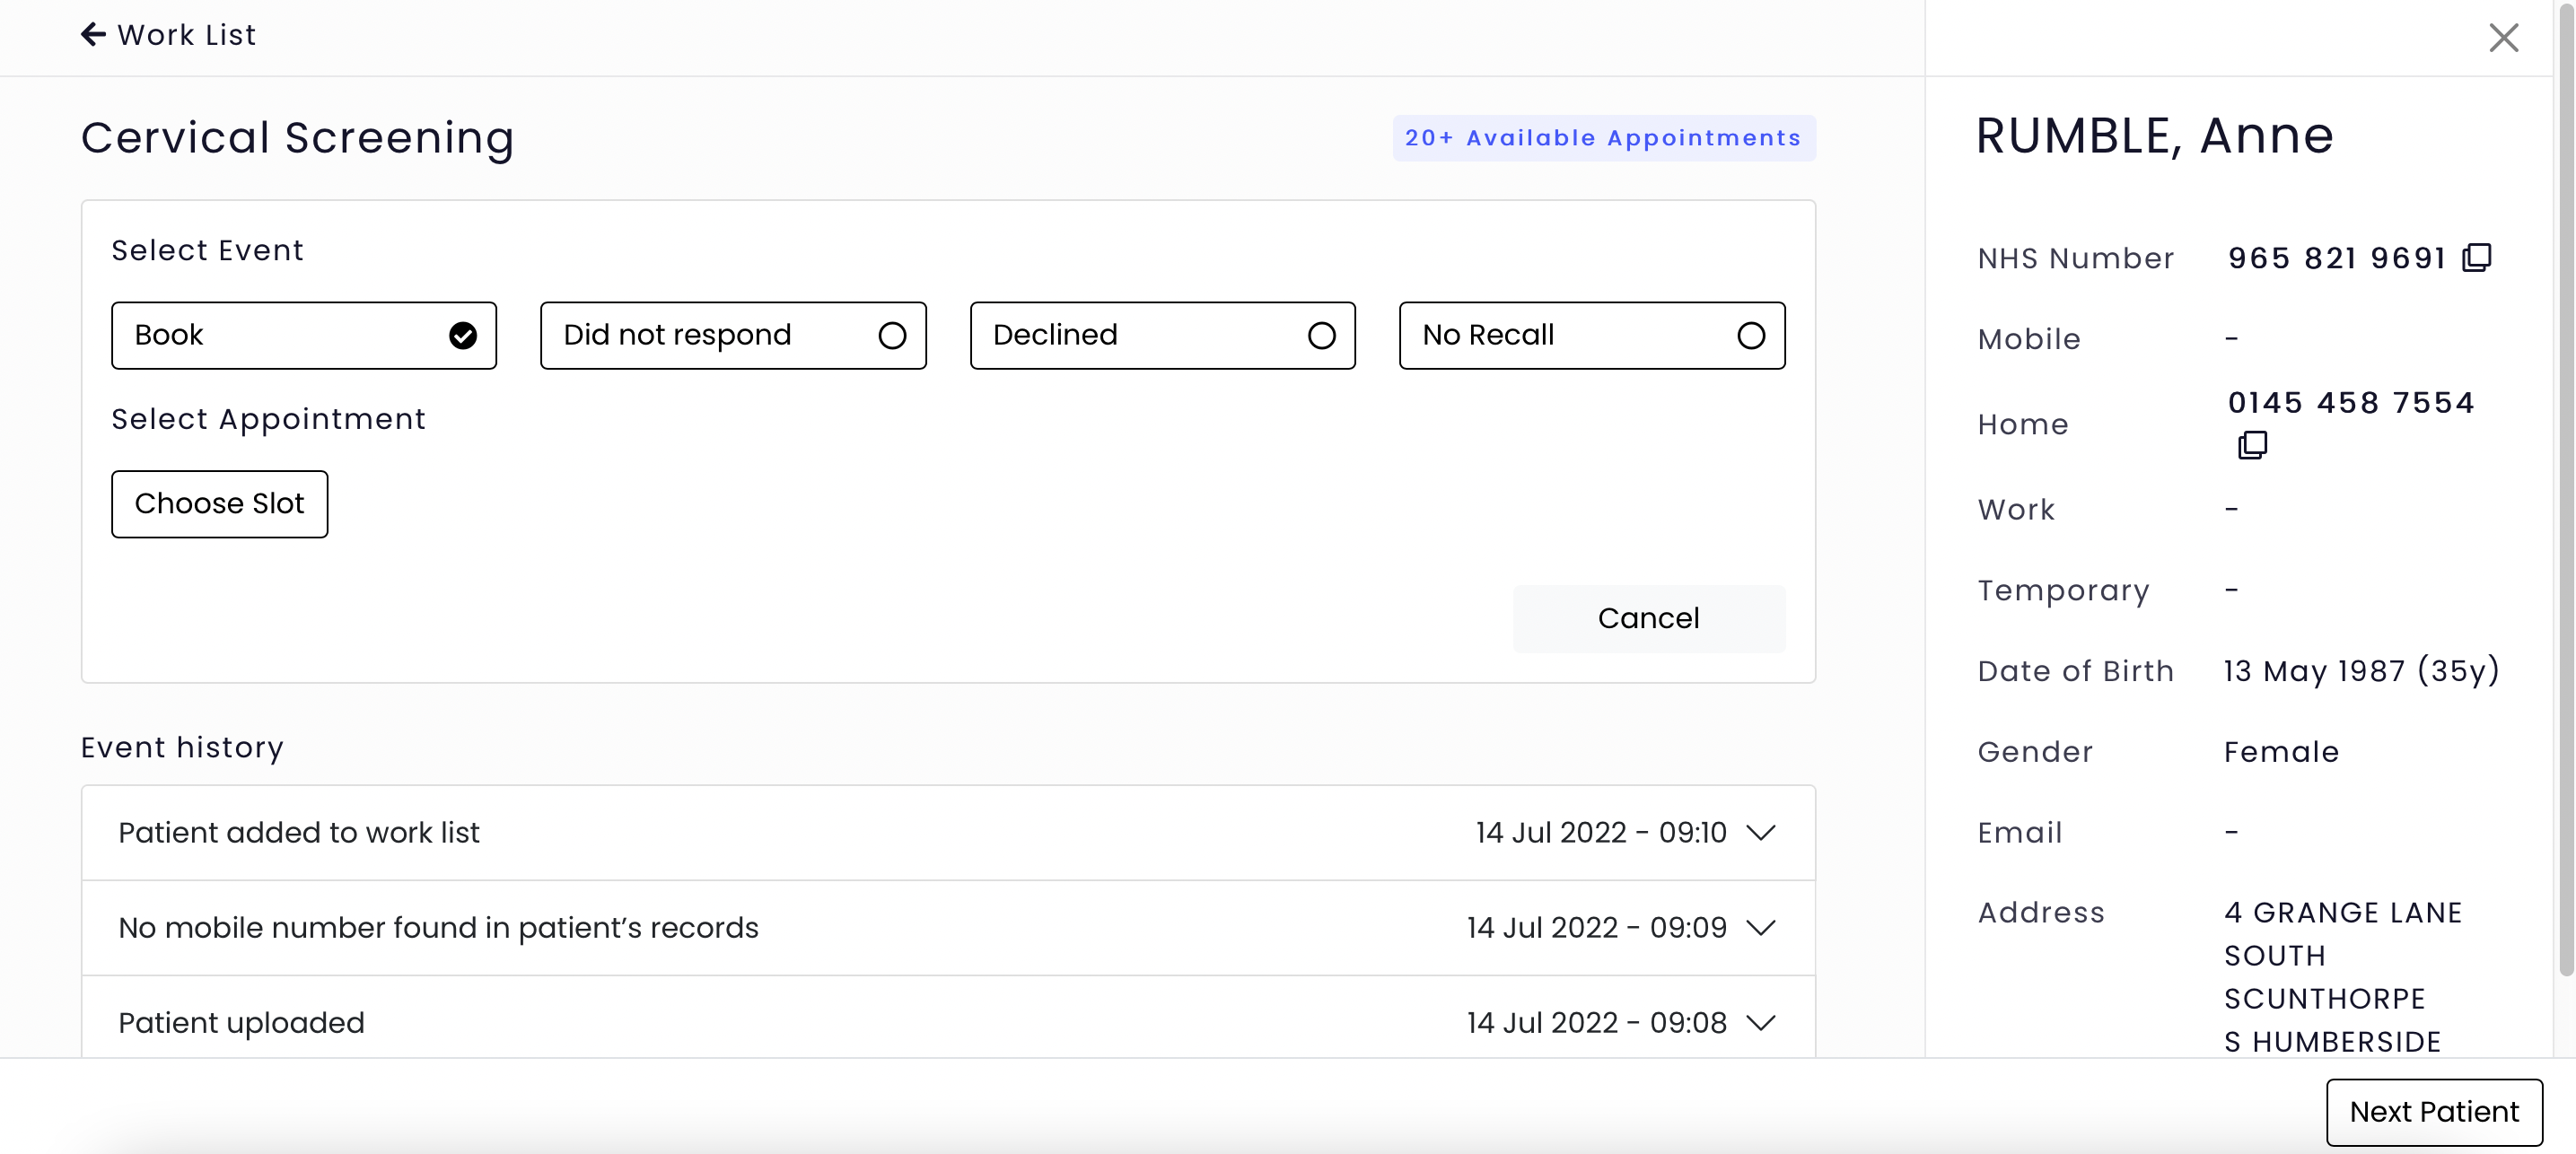
- Now it's time to call the patient. Use the appropriate phone number on the right hand side to call the patient
- You are able to record 4 seperate outcomes:
- "Book";
- "Did not respond" - mostly for use when the patient is busy and you need to call them back at another time. You have the option to leave a comment as to why you're calling them back later;
- "Declined" - for when the patient declines; and
- "No recall" for when there is no recall performed.
"Book" - this is for use when you're booking the patient in. Follow these steps to book the patient in:
- Click "Book"
- Click "Choose Slot" which appears underneath.
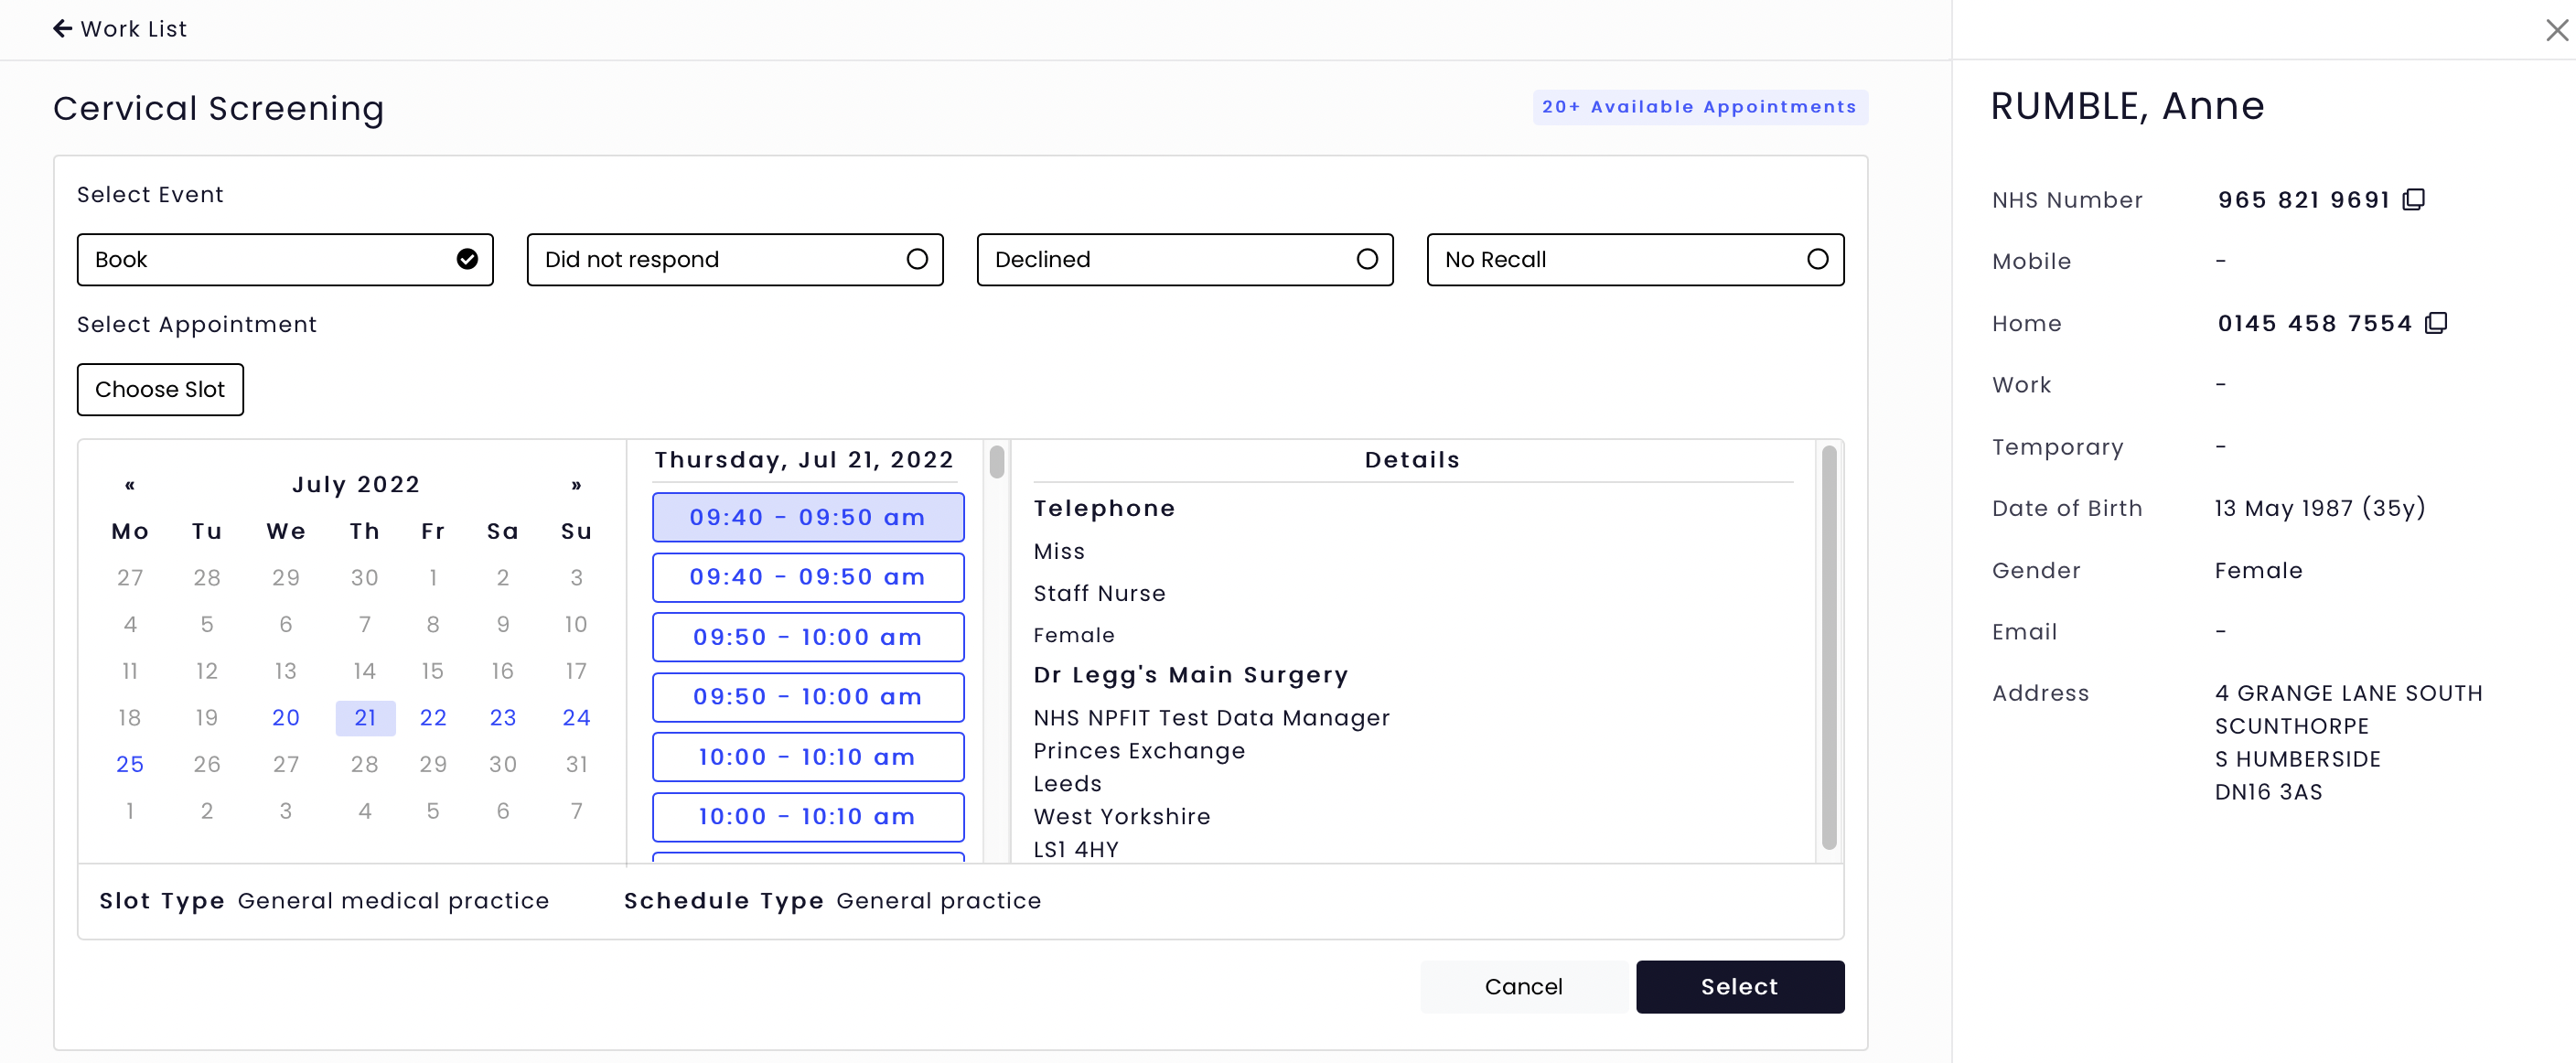
- Our system will now perform an API call to EMIS or SystmOne (which appears as a spinning wheel in the middle of the screen) to see what available and suitable slots are available for booking.
- Click on the date you want to book an appointment for (if there are available appointments then the calendar day will be blue instead of black)
- Choose the appointment from the list that appears for that day
- Click "Select" to select the appointment
- Check the appointment details that you've just chosen, and choose the appropriate SNOMED code for registering the interaction
- Finally, you have the option to leave a comment on the patient record
- Click "Confirm" to book that appointment for the patient.
- If you get an error with the message "The slot is no longer available, please select another slot" then click "Find a new slot" and repeat the steps above.
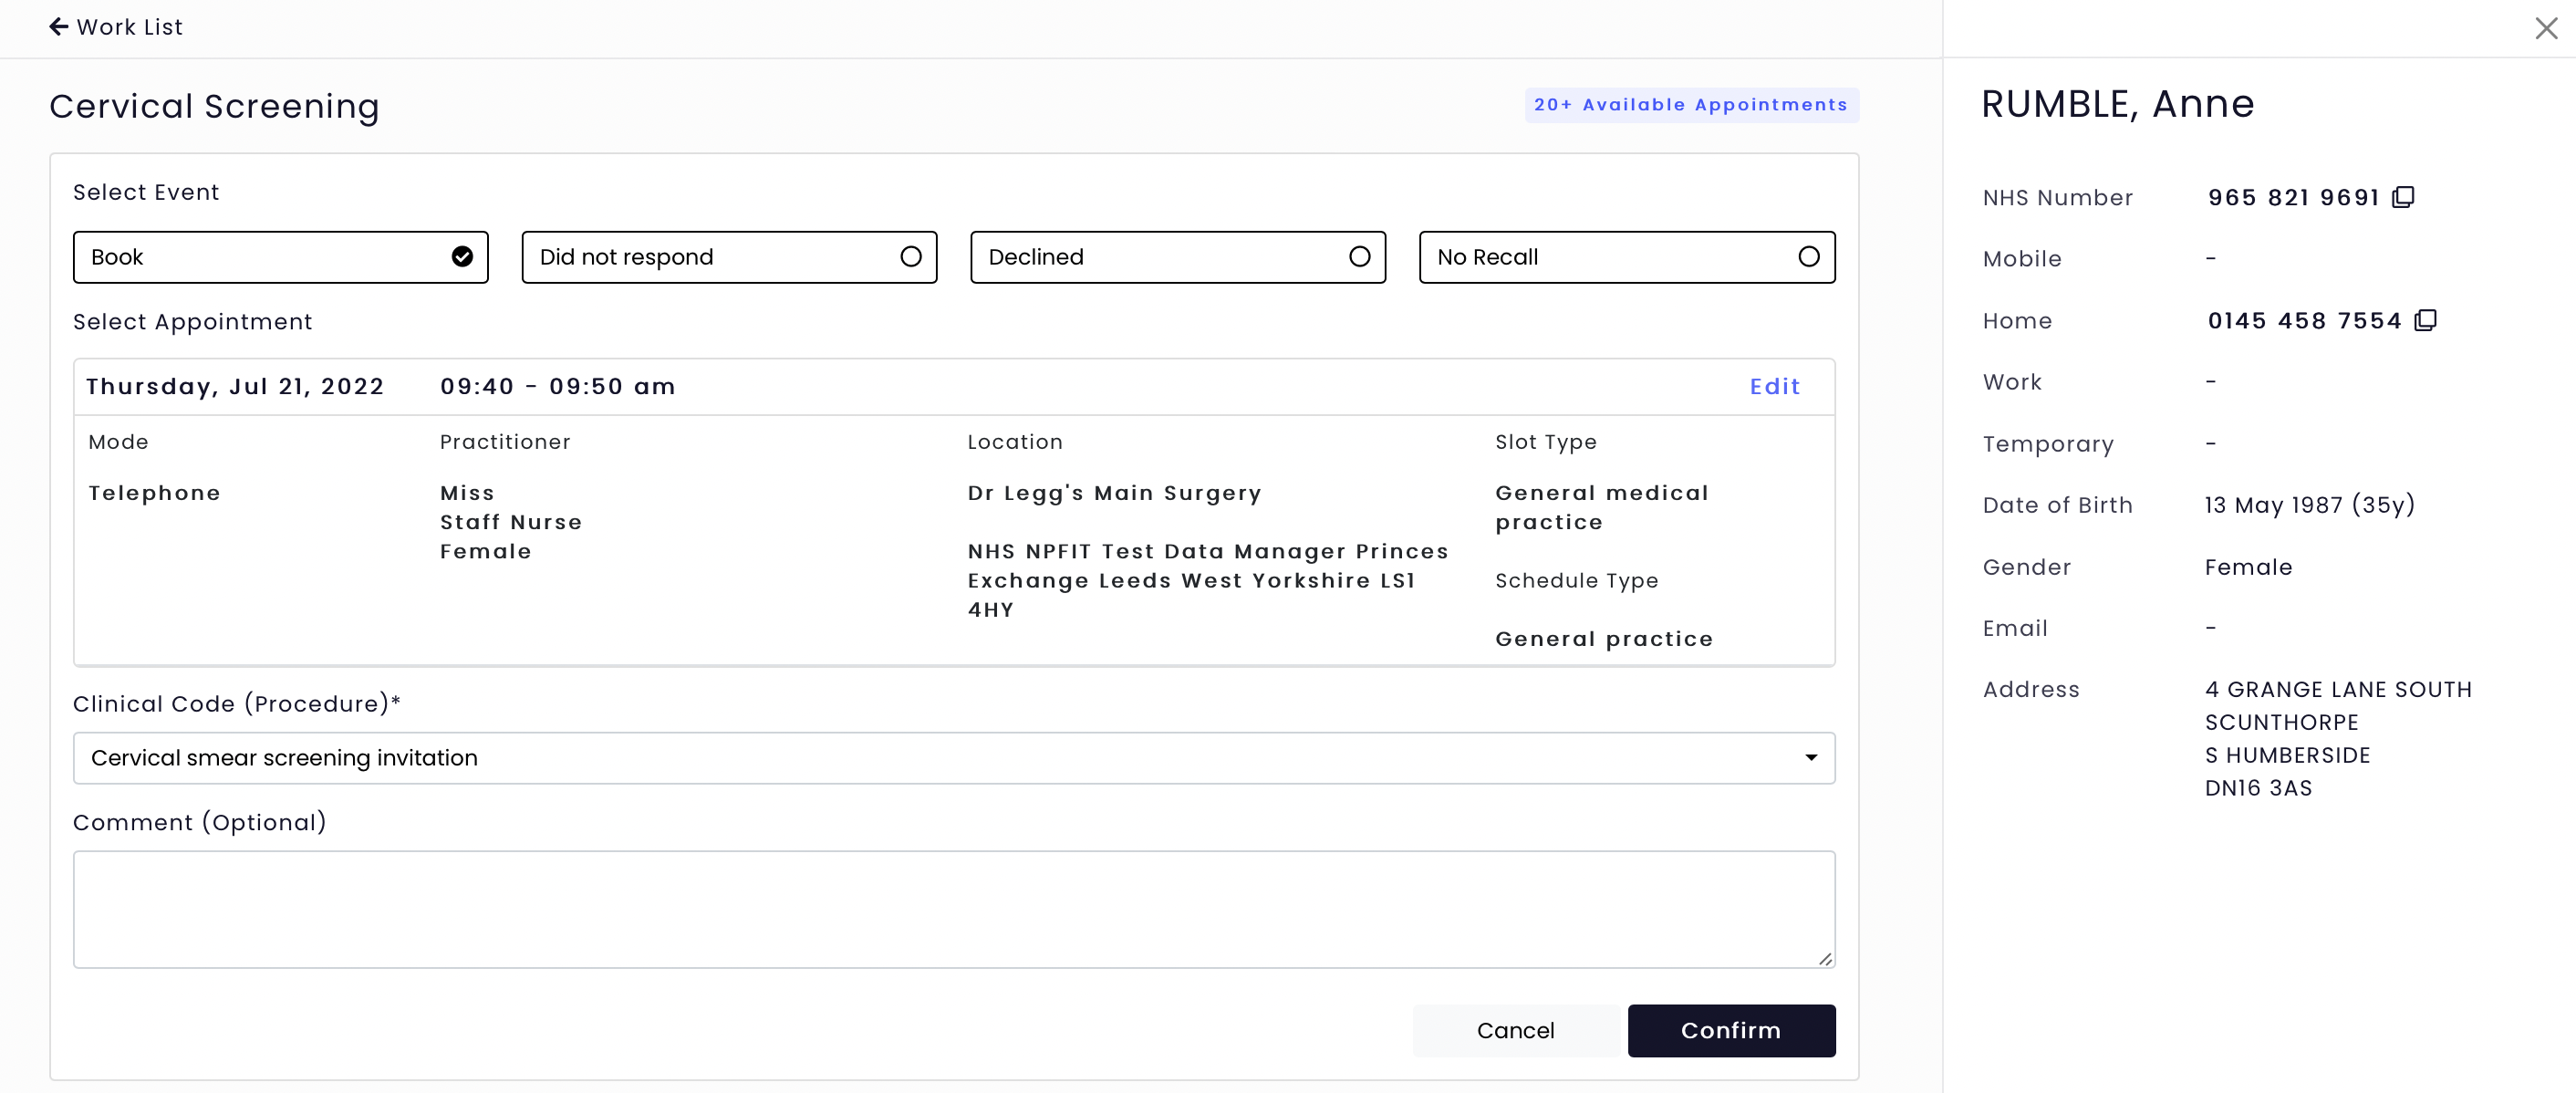
- Finally, click "Next Patient" in the bottom right of the screen after you've confirmed the booking in order to move to the next patient on the list.
Was this article helpful? Let us know!
Report a bug or give feedback on the application's features? Contact us
Thanks for the feedback! This will help us improve our content.
Oops! Something went wrong while submitting the form.
Thank you! Your submission has been received!
Oops! Something went wrong while submitting the form.