

Set up GP Connect appointments in EMIS
This guide will cover the following steps to enable GP Connect appointments in EMIS
Setup of GP Connect
- Create Organisation Group
- Create a “dummy” user for Coding
- Activate Partner API in EMIS
- Turn Automated SNOMED coding on in Appt Health
- Create or Edit Slot Types
- Ensure clinician roles are setup to accept GP Connect booking
Activation of GP Connect
7. Edit existing appointments to make them GP Connect bookable
8. Edit your session templates to ensure that all future appointments are set as GP Connect bookable.
Add slot type to Appt Health
9. Add slot type to Appt Health
Step 1: Create organisation group
In this step, you will create a new organisation group with which you can filter all GP Connect slot settings to ensure appropriate slots are booked by the correct organisations.
If you have previously set up an organisation group for Appt Health then you can use the same group for all Appt Health slots you're setting as available for GP Connect booking.
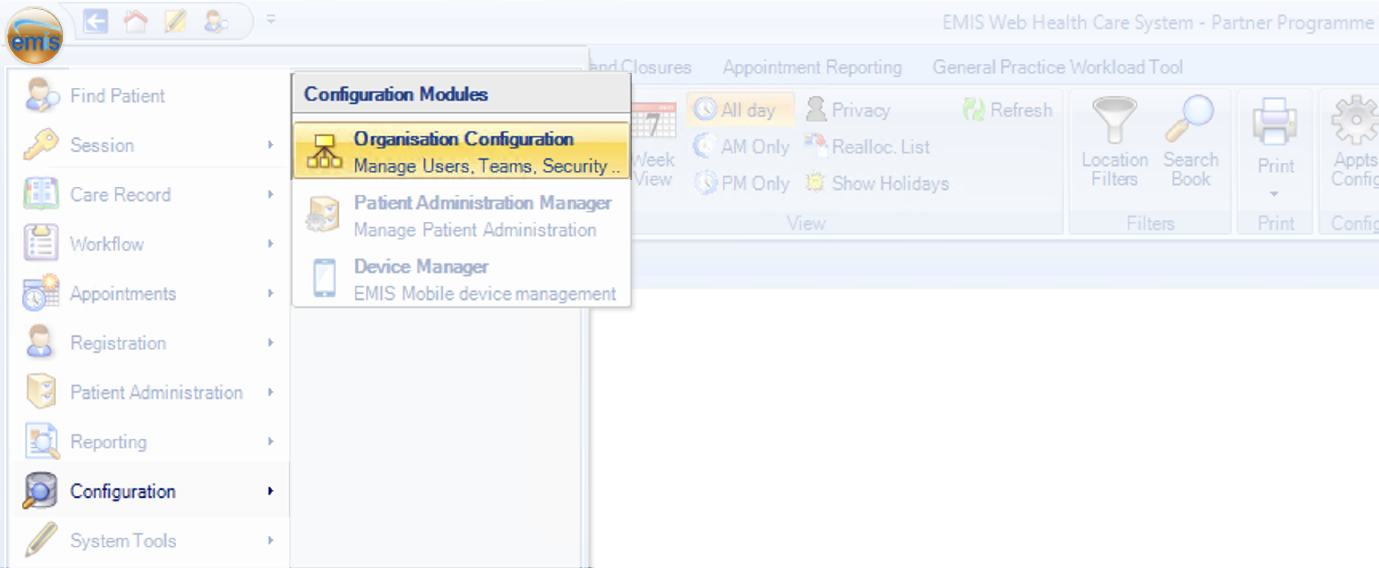
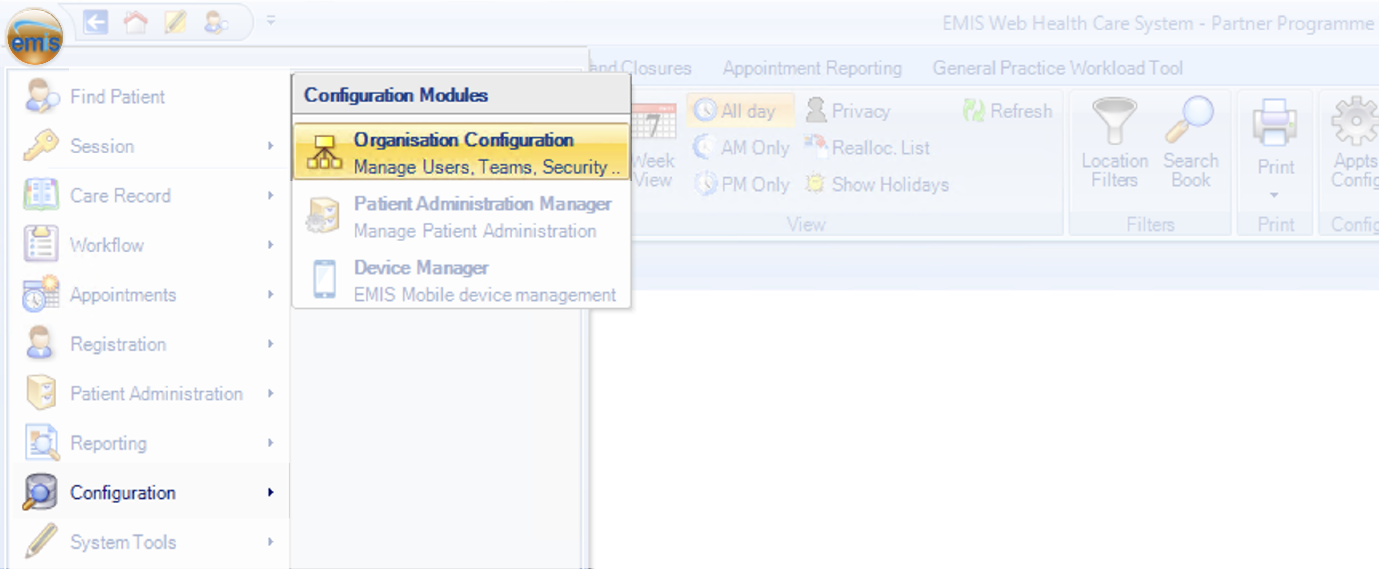
1.1 Click on EMIS bubble in the top left corner, then select 'Configuration' followed by 'Organisation Configuration'.
1.2 Click 'Organisation Groups' in the bottom left corner
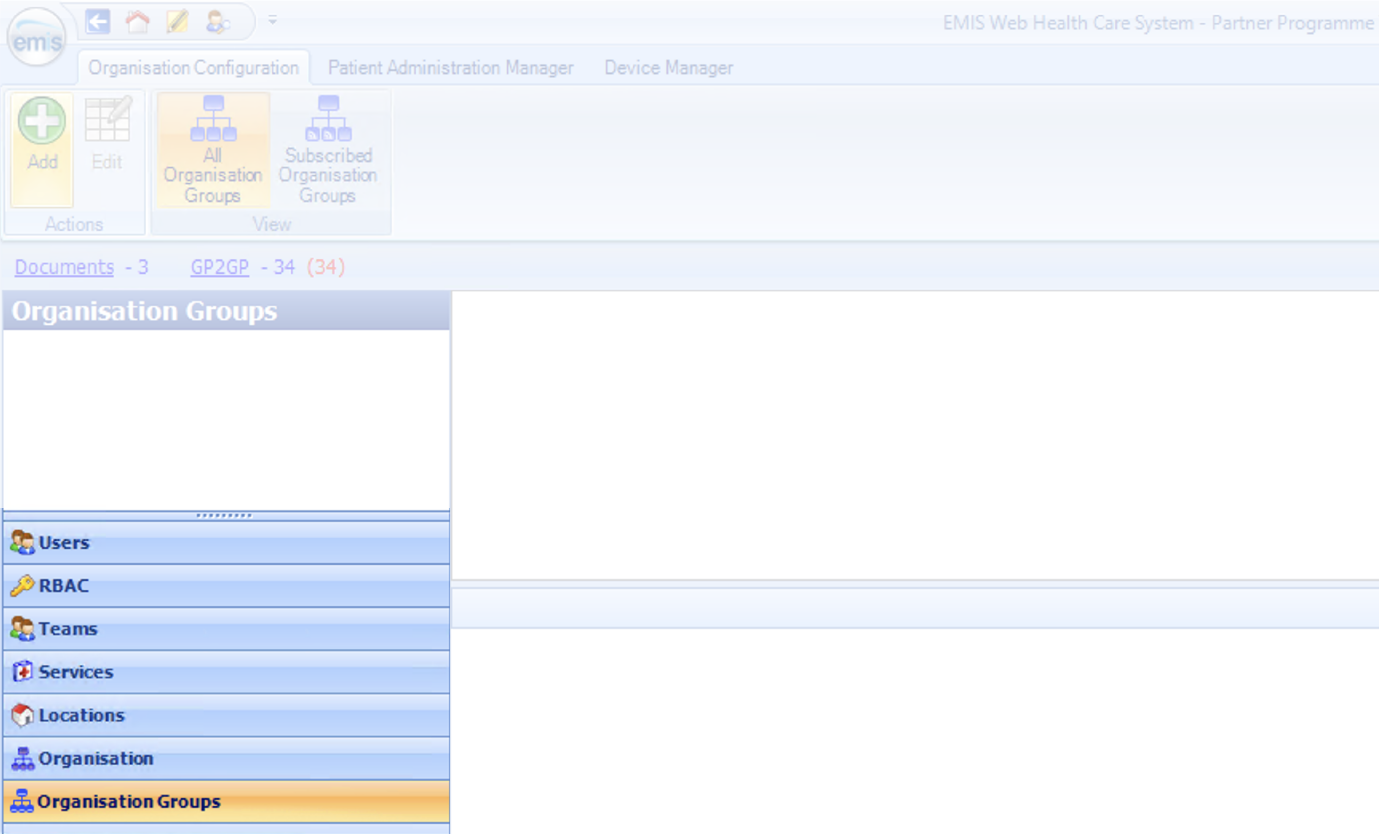
1.3 Select 'Add' in the top left corner

1.4 Fill out details
- Organisation group name: Name the group something suitable e.g. [Your Practice Name] Appt Health
NOTE: ensure you type your practice name as the system does not allow duplicate entries so if you name it something generic that has likely been used before it won’t work
- Description: If you need, add a description of the organisation
- Organisations: Search for Appt Health's ODS code 8JX33
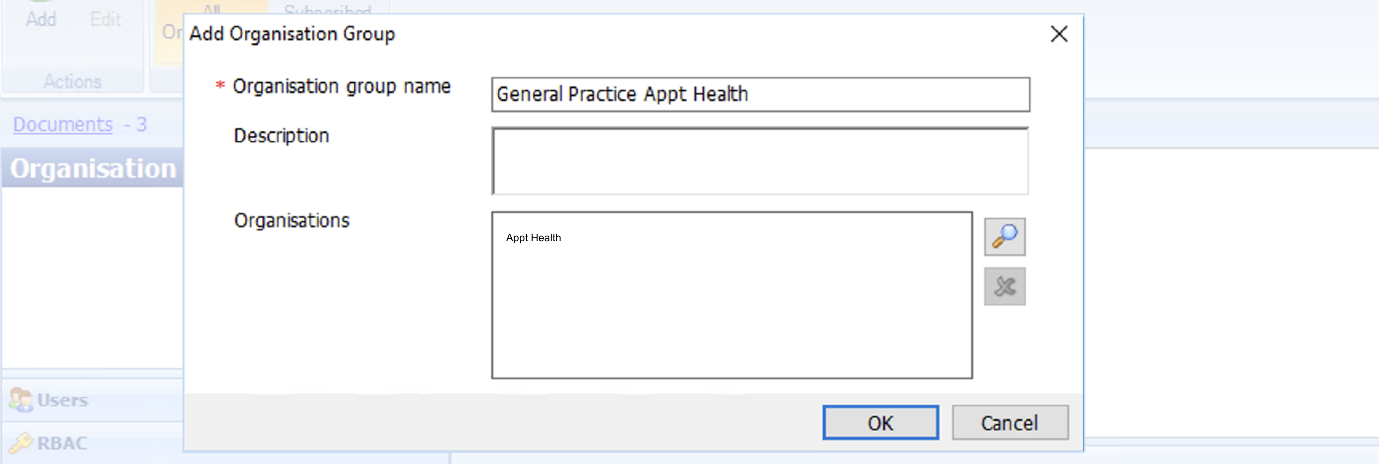
Click 'Ok' to save these details and you’ve now finished setting up an organisation group.
Step 2: Create a dummy user for Coding
In this step, you will create a new EMIS user which we will use to write codes automatically into EMIS.
2.1 Click on EMIS bubble in the top left corner, then select 'Configuration' followed by 'Organisation Configuration'.
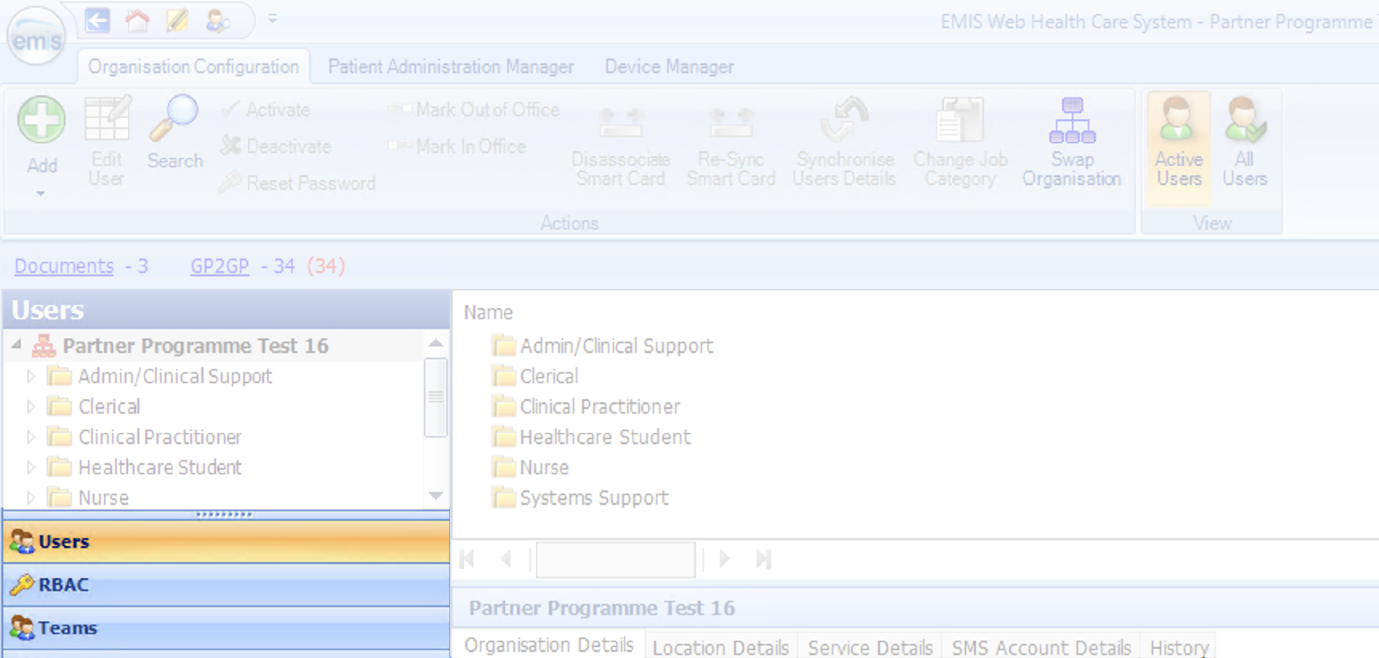
2.2 Click 'Users’ in the bottom left corner
2.3 Select 'Add' in the top left corner, choose ‘Add new user’ and use the following details:
- Title: Ms
- First name: Appt
- Last name: Health
- Gender: Not specified
- Email: support@appt-health.co.uk
- Username: ApptHealthUser
- Password: [Set a secure password]
Important: Ensure that the option "User must change password on next sign-in" is not selected.
2.4 Go to the ‘Role’ section and use the following details:
- Job Category: Manager
- User Mnemonic: ApptHealthUser
- Authorisation for prescriptions: None
- Relationship: Associated
- Contract start date: Set to today’s date
- Contract end date: Leave this field blank (do not set an end date)
2.5 Open ‘User Role Profile’ from the left-hand menu
2.6 Set the RBAC role to “Practice Manager (SJR004)”
You’ve now finished creating a new user.
Step 3: Activate Partner API in EMIS
In this step, you will activate the Appt Health Partner API in EMIS to allow codes to be written automatically into EMIS.
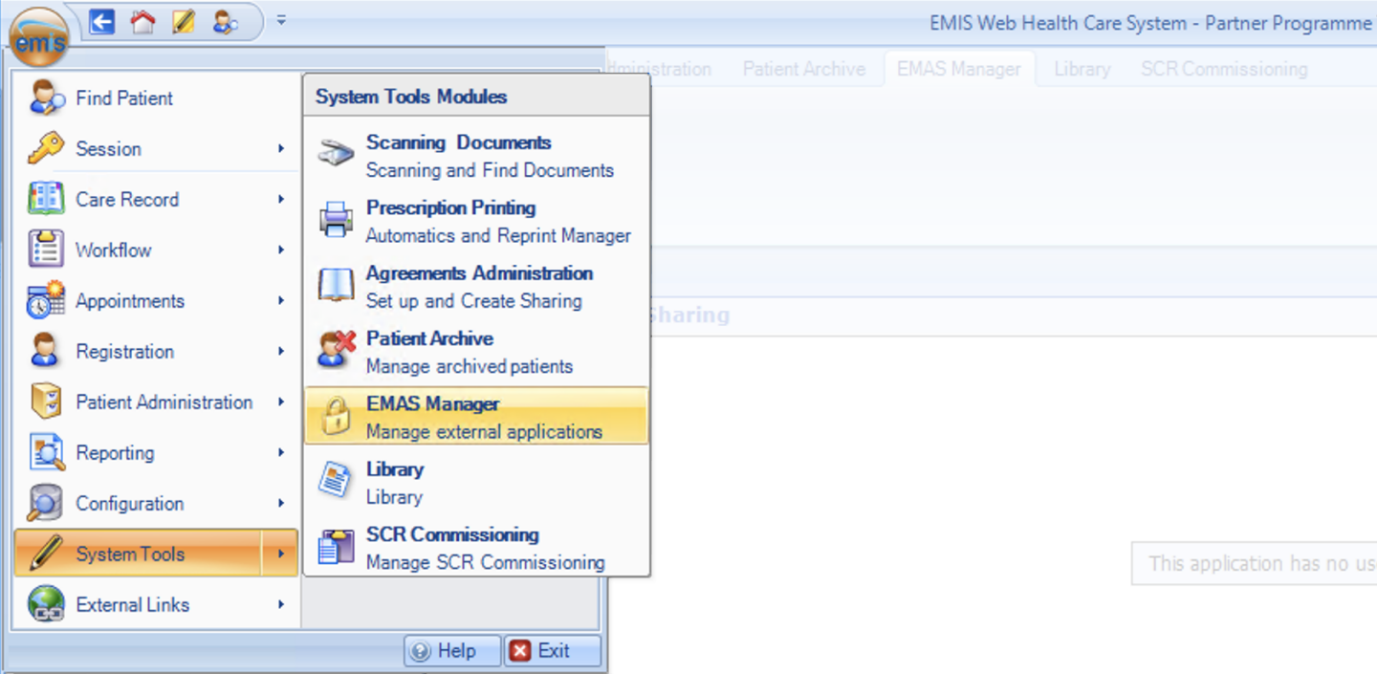
3.1 Click on EMIS bubble in the top left corner, then select 'System Tools’ followed by ‘EMAS Manager'.
3.2 Click ‘Partner API’ in the bottom left corner

3.3 Select the Partner API ‘Appthealth’
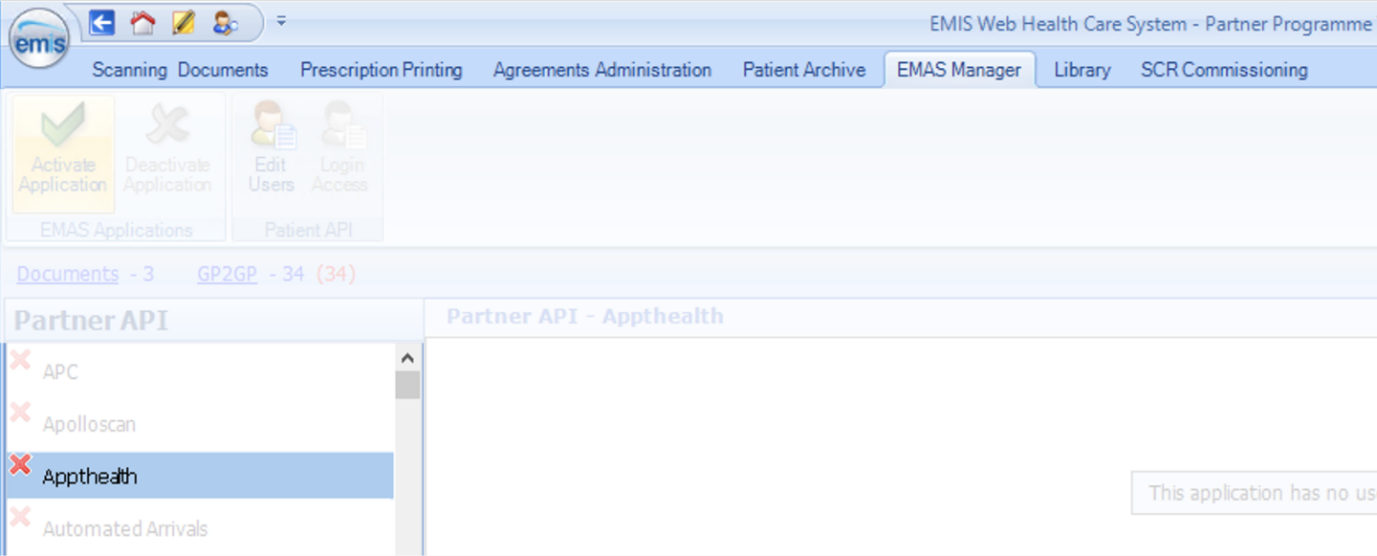
3.4 Click ‘Activate Application’ in the top left

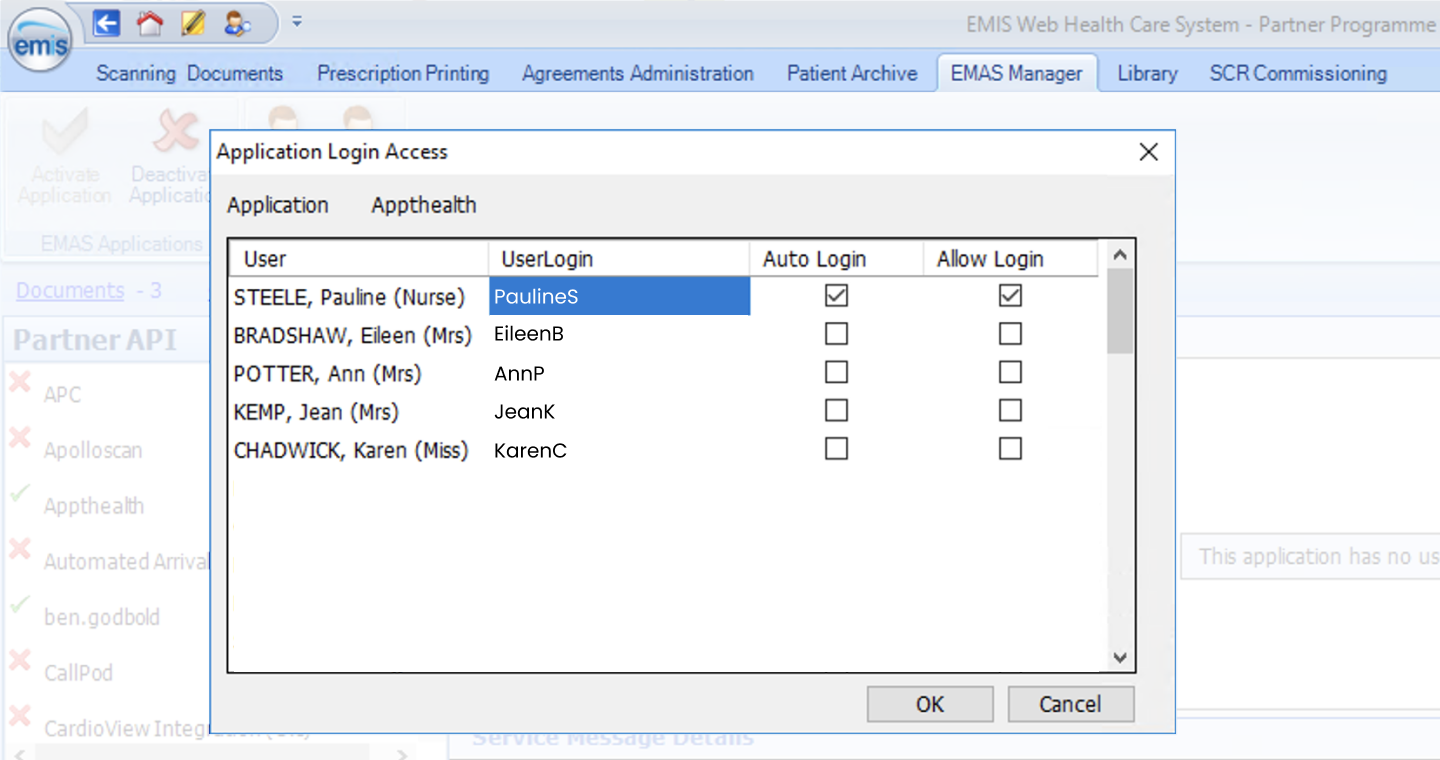
3.5 Click ‘Login Access’ in the top left

3.6 Select the “dummy” user you’ve previously created (Ms Appt Health, ApptHealthUser) and tick both ‘Auto Login’ and ‘Allow Login’
You’ve now finished activating the Appt Health Partner API.
Step 4: Turn Automated SNOMED coding on in Appt Health
In this step, you will login to Appt Health and turn on coding into EMIS.
4.1 Login to Appt Health using this link: https://recall-8jx33.appt-health.thirdparty.nhs.uk/practices
4.2 Click ‘Account’ on the left hand side, and click on the ‘Integrations’ tab
4.3 Click ‘Enable coding’
4.4 Enter the username for your “dummy” user (ApptHealthUser)
4.5 Click ‘Save’
You’ve now turned on automated SNOMED coding in Appt Health.
Step 5: Create or Edit Slot Types
In this step, you will make sure a slot type is ready to be made bookable via GP Connect.
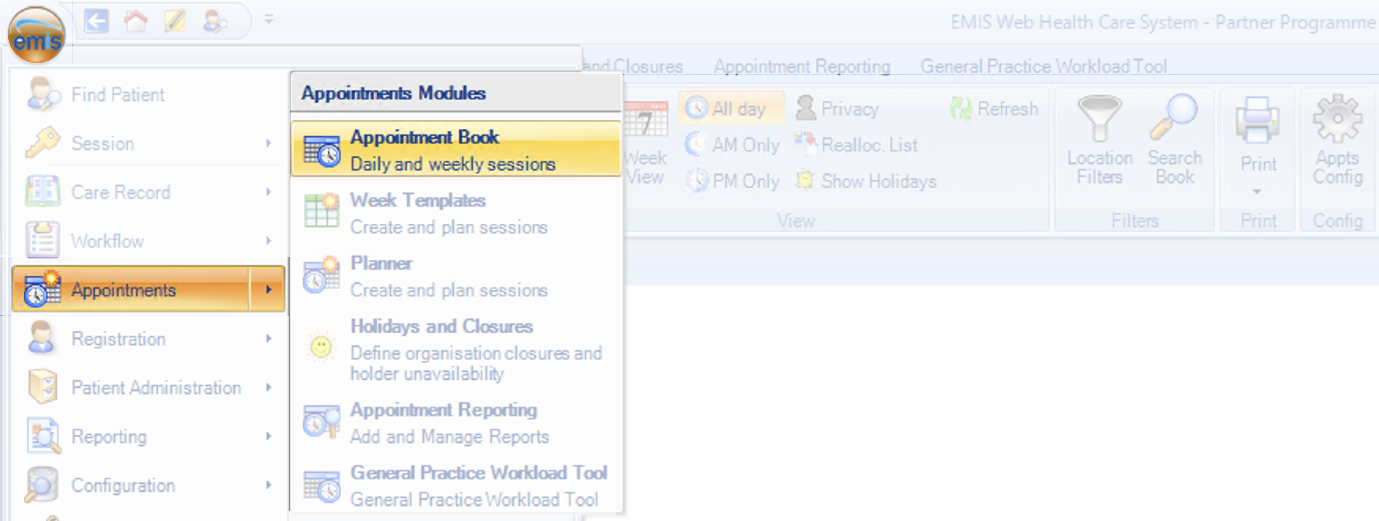
5.1 Click on EMIS bubble in the top left corner, then select 'Appointments’ followed by ‘Appointment Book’.
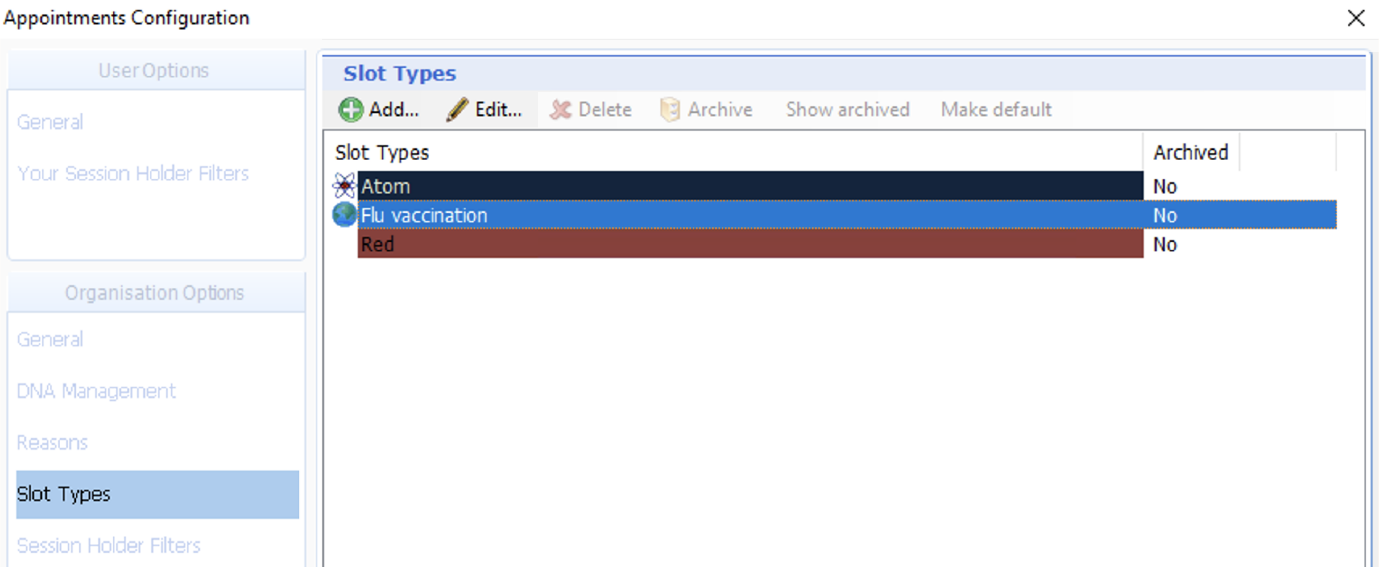
5.2 Click ‘Appts Config’ in the top right corner

5.3 Click ‘Slot Types’ and then either select an existing slot or click ‘Add’ to create a new one.
5.4 Make sure ‘Bookable slot’ is ticked, then fill out the rest of the information as appropriate
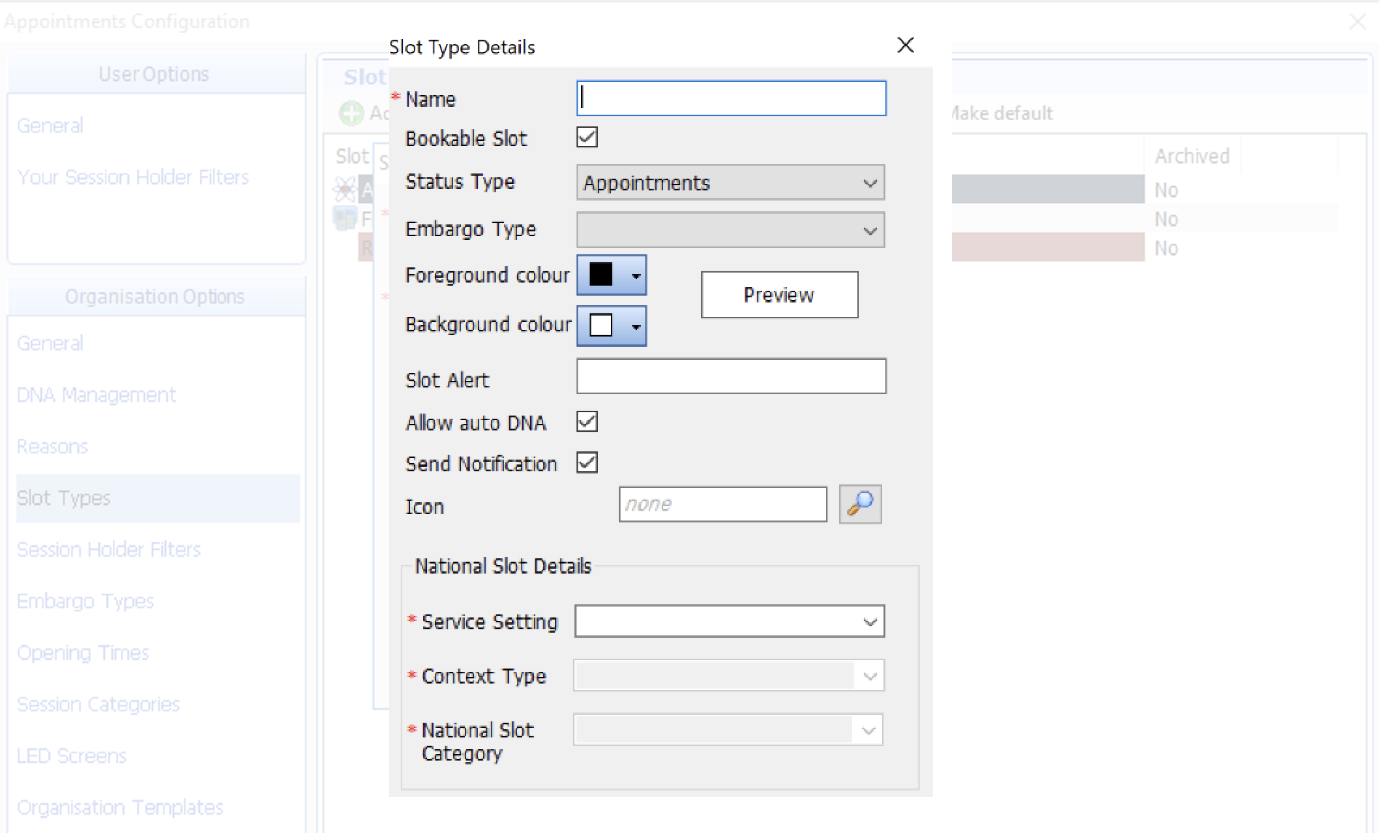
5.5 Click ‘Ok’ to save
You have now set up your slot type as ready for GP Connect to be turned on.
Step 6: Ensure clinician roles are setup to accept GP Connect booking
In this step, you will create a dummy practitioner and ensure all staff who will run appointments which Appt Health will book are setup correctly.
6.1 Click on EMIS bubble in the top left corner, then select ‘Configuration’ followed by ‘Organisation Configuration’.
6.2 Click ‘Users’ in the bottom left corner
6.4 Click ‘Add’ in the top right corner and choose ‘Add new user’
6.5 Create a dummy user that will be associated to session templates, using appropriate details and settings but ensuring the following is set correctly in the ‘Role’ tab on the left-hand menu:
6.5.1 Set as an Appointment Session Holder.

6.5.2 ‘Job Category’: Set to one of the options listed below. This is a GP Connect list which means that if it is something not on this list, we will not be able to set slots as GP Connect bookable.
- General Medical Practitioner
- Salaried General Practitioner
- Student Practice Nurse
- Specialist Nurse Practitioner
- Sister/Change Nurse
- Staff Nurse
- Midwife
- Community Nurse
- Dietitian
- Pharmacist
- Psychotherapist
- Clinical Psychotherapist
- Social Worker
- Healthcare Support Worker
- Healthcare Assistant
- Counsellor
- Phlebotomist
- GP Registrar
- Sessional GP
6.5.3 Set ‘Patient Facing Services Booking’ to ‘All Appointments’
6.5.4 Click ‘Ok’ to save these details
Now you will check the same settings but for all real clinicians who you will want to hold sessions with GP Connect appointments in.
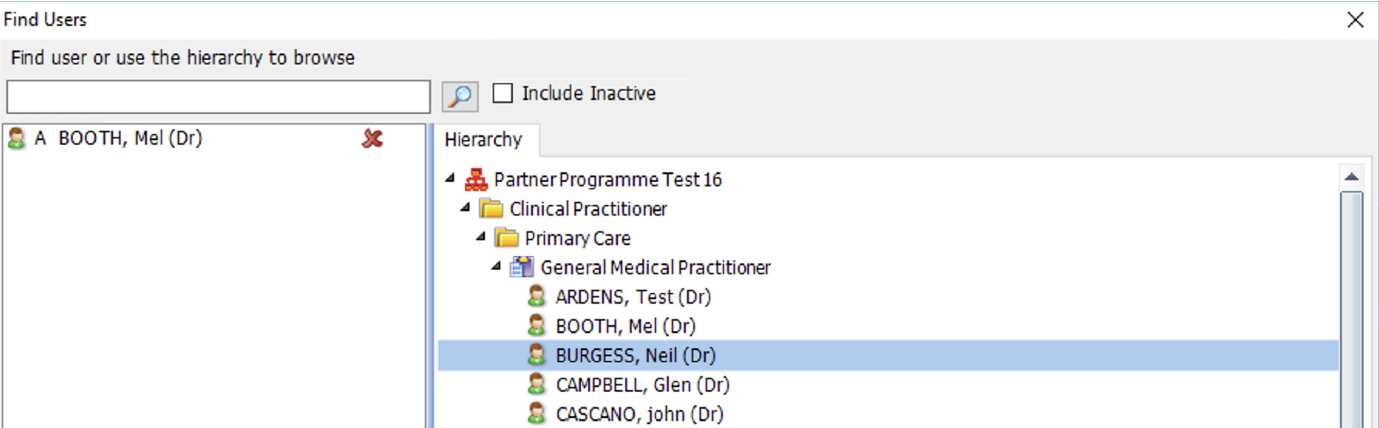
6.6 Click ‘Search’ in the top left corner

NOTE: The next steps must be done for all users who you will be assigning to sessions where you have slots you want to make GP Connect bookable.
6.7 Select the user you want to assign the session (containing the slots you want to make GP Connect bookable) and click ‘Ok’
6.8 Click ‘Role’ on the left side menu
6.9 Make sure ‘Job Category’ is set to one of the options listed above in step 6.5.2
6.91 Set ‘Patient Facing Services Booking’ to ‘All Appointments’
6.92 Click ‘Ok’ to save these details.
You have now set the user role correctly so that sessions assigned to this user can contain appointments which are available for GP Connect booking. Please make sure to repeat steps 6.4 through to 6.8 for all users who will be assigned sessions containing GP Connect bookable appointments.
Activation of GP Connect
Edit existing appointments to make them GP Connect bookable
In this step, you will turn on GP Connect for appointments already scheduled in your appointment book.
7.1 Find the session in your appointment book you want to edit
7.2 Select the appointments you want to make GP Connect bookable, right click on them and click ‘Slot Properties’
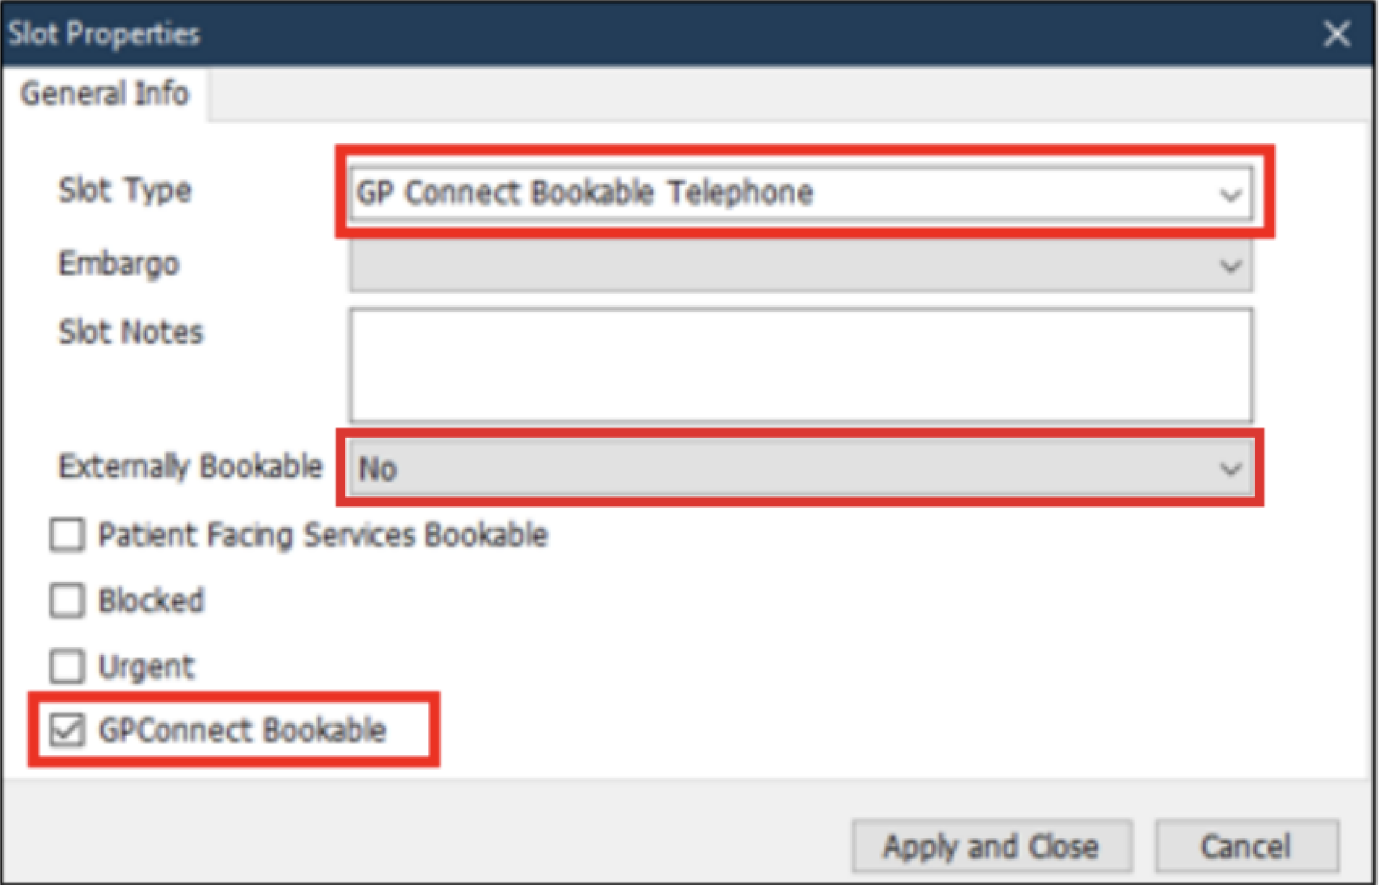
7.3 Set your slot property settings in this way:
- Slot type: Set it to the one you've created for these appointments
- Externally bookable: Set to 'No'
- GPConnect Bookable: Must be ticked
Note: If it doesn’t give you the option to tick GPConnect Bookable, most likely this is because the Session Holder does not have the correct GP Connect role assigned. Please right click on the session title and click ‘Session Properties’, select Session Holders and ensure you’ve followed steps 6.4 – 6.6 for them.
Click 'Apply and Close' and you will see those slots are now set as GP Connect Bookable. This will be represented by a globe beside the slot.
7.4 Right click on the session title and click ‘Session Properties’
7.5 Add up how many appointment slots you have set available for GP Connect Bookable in this session and note it down
This is because we need to apply a filter to ensure that NHS 111 and other organisations cannot book into these specific slots.
7.6 Click on 'Apply Filter' found under 'All slots GP Connect bookable'
7.7 Set up filter
- Filter type: Select 'Organisation Group'
- Name: Search for the organisation group we have created in step 1.4 'Fill out details'
- Number of slots: Input the number of slots that are set for GP Connect bookable in this session - these are the ones you have just noted down. This is essential to make sure NHS 111 do not accidentally book Appt Health reserved slots
- Kind: Select 'Reserve'
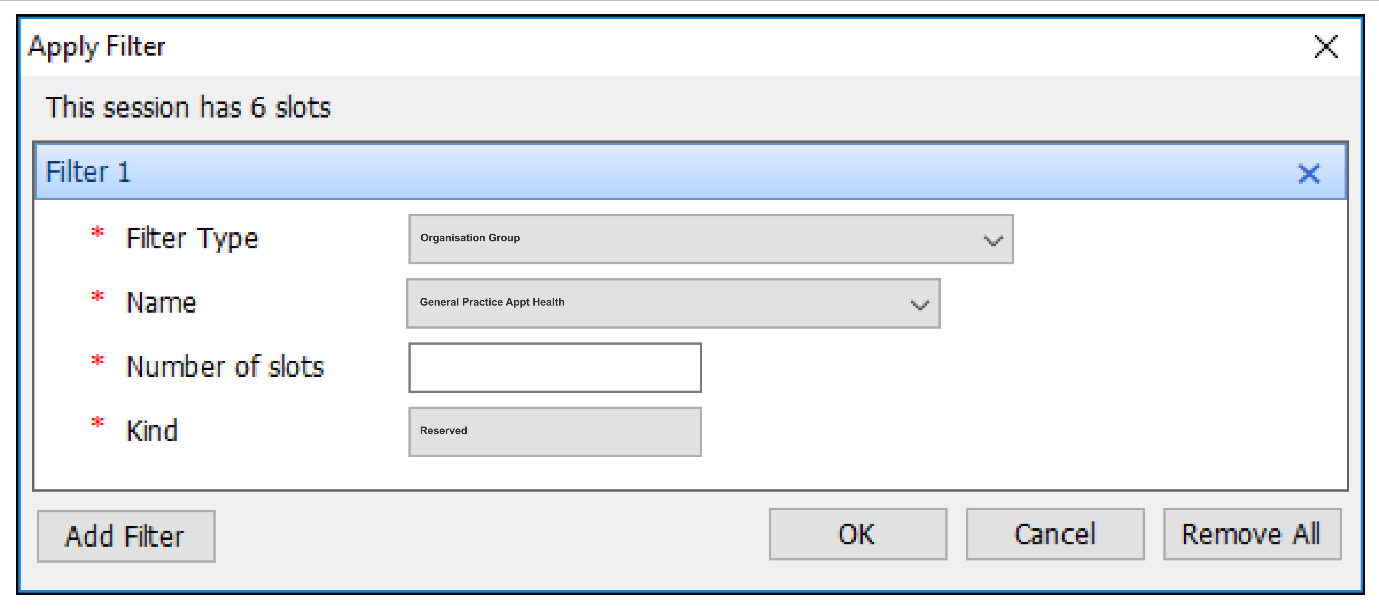
Click 'Ok' then 'Ok' to save changes
You have now completed setting up a slot type ready for GP Connect Booking
Edit your session templates to ensure that all future appointments are set as GP Connect bookable
In this step, you will edit and save your template for any sessions you will schedule in the future that you want to have GP Connect bookable slots in.
8.1 Click on EMIS bubble in the top left corner, then select ‘Appointments’ followed by ‘Appointment Book.

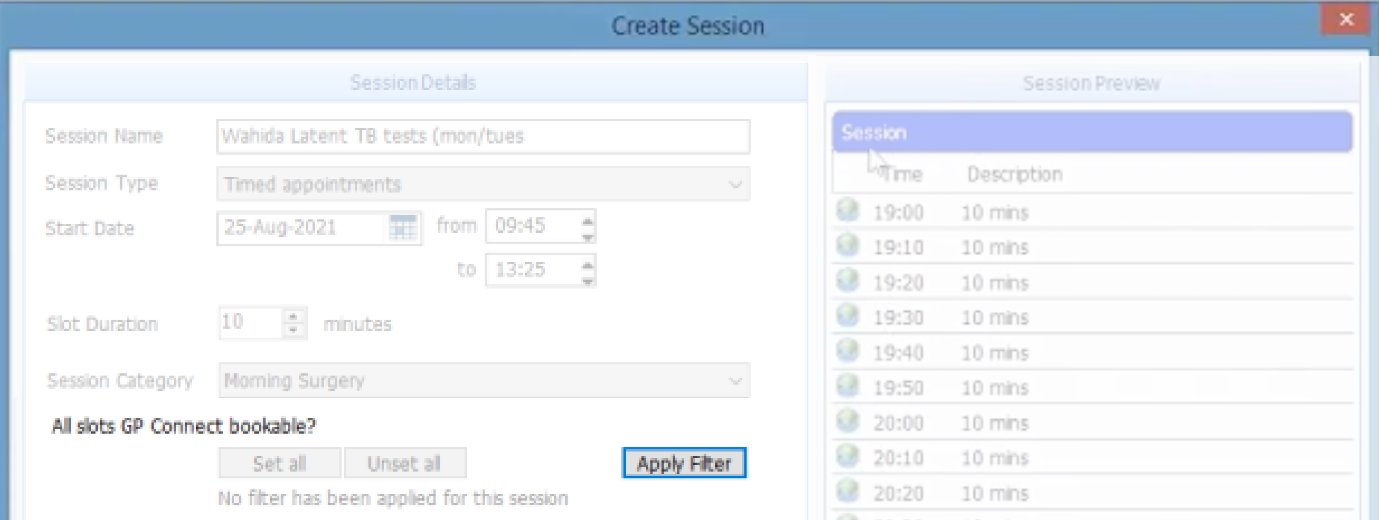
8.2 Click ‘Create Session’

8.3 Click on ‘Load from Template’ at the bottom
8.4 Select ‘Session Holders’ and review who is down as the session holder
At this stage, if the template you’re editing is just for one clinician, you can just ensure that clinician is chosen as the session holder here and that they are setup for GP Connect as per the instructions in 6.9 – 6.92
If you are editing a template that is used for multiple clinicians and therefore doesn’t have a session holder set at this point, you should choose the Dummy Practitioner you created in step 6.4 – 6.6
Once you have added a session holder, move on to the next step.
8.5 Select ‘Session Details’
8.6 Select the slots on the right-hand side that you wish to make GP Connect Bookable, right click on them and click ‘Slot Properties’
8.7 Set your slot property settings in this way:
- Slot type: Set it to the one you've created for these appointments
- Externally bookable: Set to 'No'
- GPConnect Bookable: Must be ticked
Note: If it doesn’t give you the option to tick GPConnect Bookable, most likely this is because the Session Holder does not have the correct GP Connect role assigned. Please right click on the session title and click ‘Session Properties’, select Session Holders and ensure you’ve followed steps 6.4 – 6.6 for them.
Click 'Apply and Close' and you will see those slots are now set as GP Connect Bookable. This will be represented by a globe beside the slot.
8.8 Add up how many appointment slots you have set available for GP Connect Bookable in this session and note it down
This is because we need to apply a filter to ensure that NHS 111 and other organisations cannot book into these specific slots.
8.9 Click on 'Apply Filter' found under 'All slots GP Connect bookable'
8.91 Set up filter
- Filter type: Select 'Organisation Group'
- Name: Search for the organisation group we have created in step 1.4 'Fill out details'
- Number of slots: Input the number of slots that are set for GP Connect bookable in this session - these are the ones you have just noted down. This is essential to make sure NHS 111 do not accidentally book Appt Health reserved slots
- Kind: Select 'Reserve'
Click 'Ok' then 'Ok' to save changes
You have now completed setting up a slot type ready for GP Connect Booking.
Make sure you do this step for all session templates you wish to contain GP Connect Bookable slots.
Step 9: Add slot type to a target in Appt Health
Now you are ready to return to the Appt platform. On ‘Create target’ on your Appt Health platform, you should be able to find your slot type in the dropdown menu. If you are not able to find it, click on the ‘Refresh’ button.

If you need any help, don’t hesitate to contact support support@appt-health.co.uk.