

Adding a patient list
Prepare your new patient list
1. Export the patient list
Download the desired patient list from your Clinical System/Patient Administration System (EMIS or SystmOne). The list should include only patients who are eligible for the selected screening.
2. Format your patient list
Format your patient list so it has NHS numbers in column A and dates of birth in column B. There should be a header row:
%20(1).png)
The NHS number must contain 10 numbers and the date of birth has to be in one of the following formats:
- DD/MM/YYYY
- DD-MM-YYYY
- DD/MMM/YYYY
- DD-MM-YYYY
- YYYY/MM/DD
- YYYY-MM-DD
To format the date:
- Click 'Home' and open the Number formatting options
%20(1).png)
- Select the 'Date' Category, and select the third 'Type' option
%20(2).png)
3. Save your patient list as a .CSV file (Comma Separated Values)
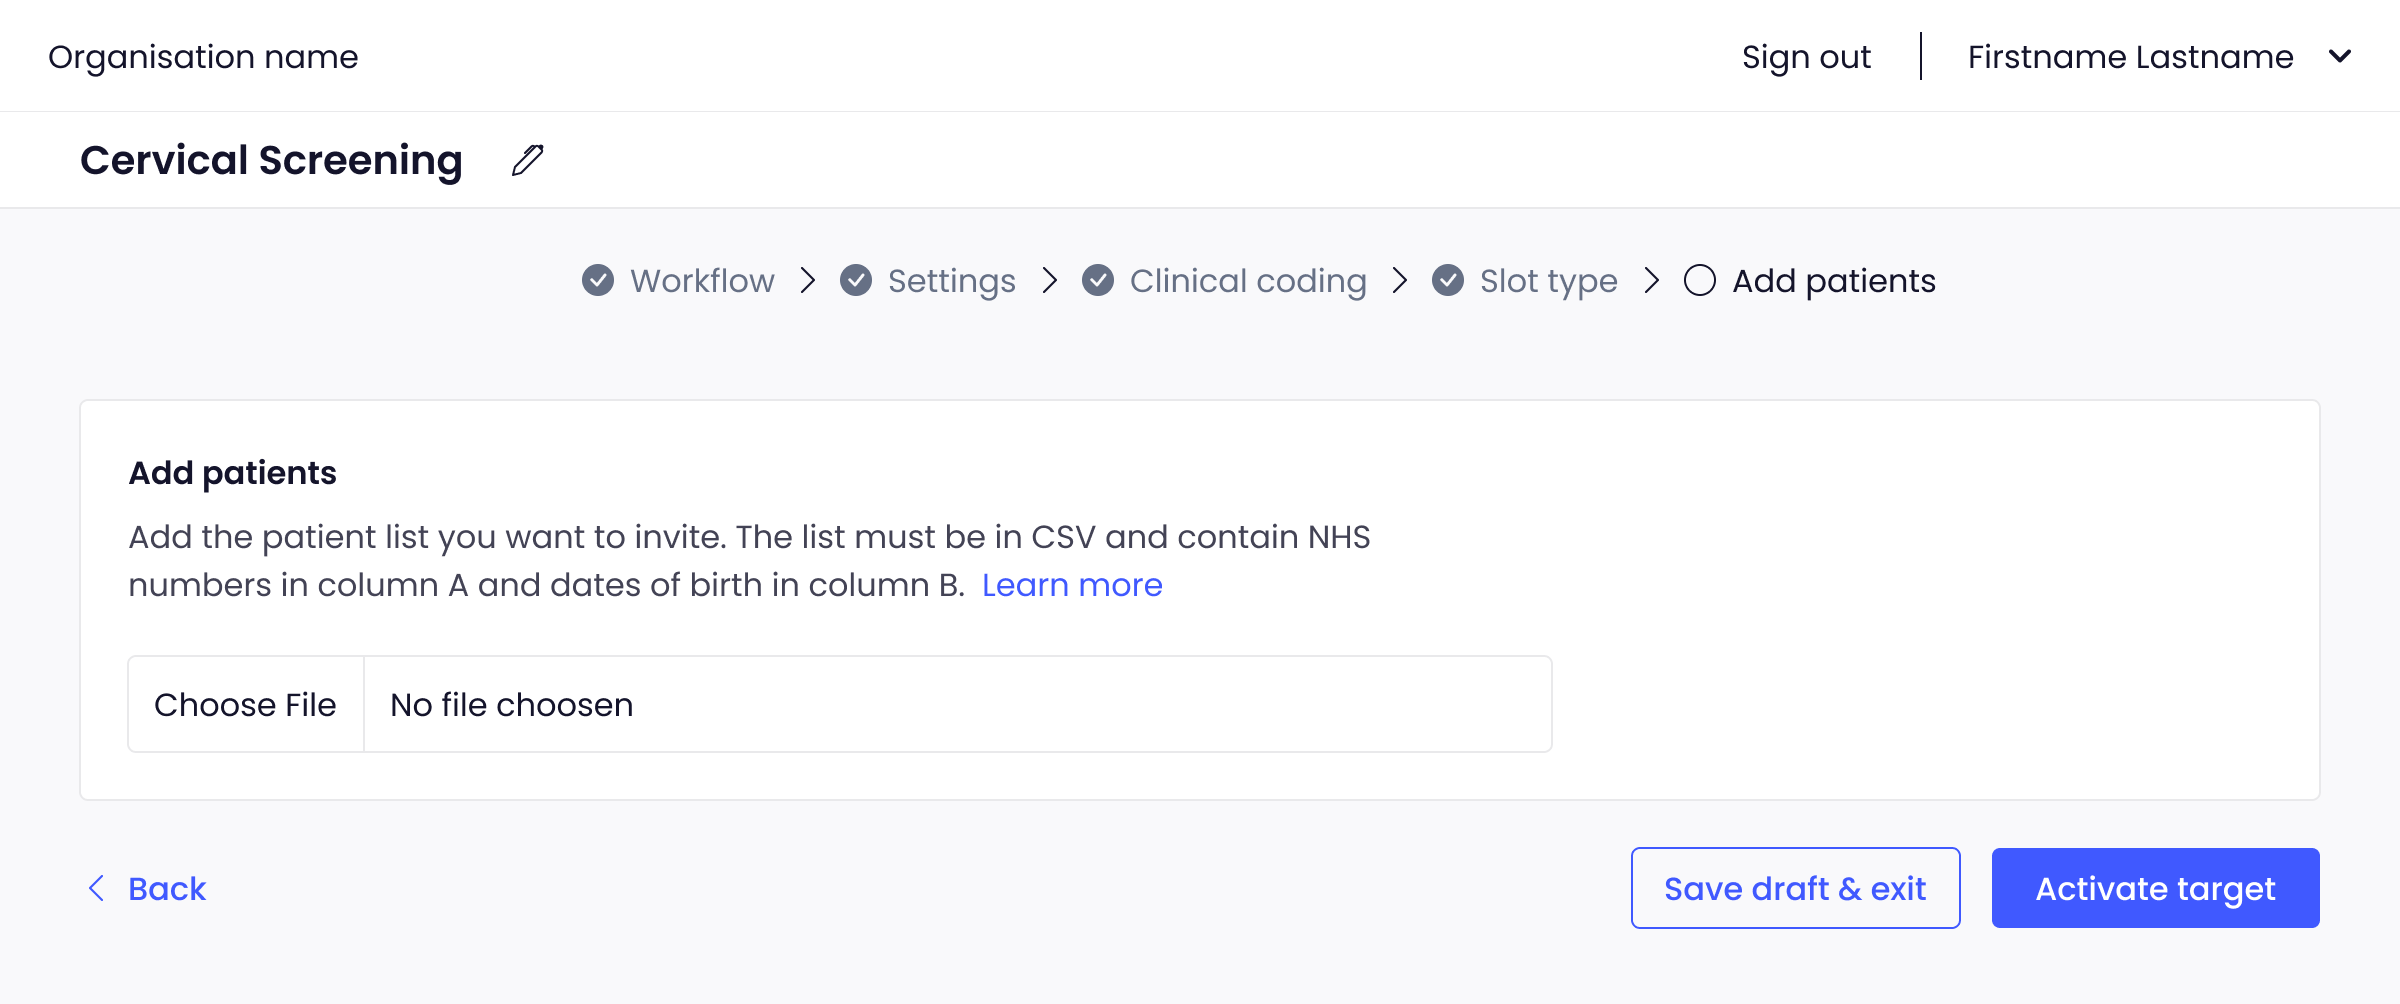
Add your first patient list
When you are creating a new target in the Appt Health portal, you will be asked to upload your file on the ‘Add patients’ step. Click ‘Choose file’ and then select the CSV file you saved. Once you have selected the file containing your patient list, click the ‘Activate target’ button.
Add one patient list at a time, upload progress will be displayed on the screen.
If your patient list is in the wrong format, you'll get an error message, for information on solving common errors read this guide.
Inviting patients
Once the patient list has been uploaded and sufficient appointment slots are available, Appt Health will begin the automated invitation process.. Although this process might take 15 minutes to stat, you don’t need to do anything to begin inviting patients.
Adding more patients to a target
If you want to add more patients to a target that is already active:
- Select the ‘Upload patients’ button on the top right corner on the target page and select ‘Add patients’
- Click ‘Choose file’ and select the CSV file of the list you would like to upload
- Select ‘Add patient list’ and the new patient list will be added to your target.
- Add one patient list at a time, upload progress will be displayed on the screen.

Any new patients in the uploaded list will be added to the patient list and will be invited in turn.
If you need any support adding patients to your targets, please contact support@appt-health.co.uk.